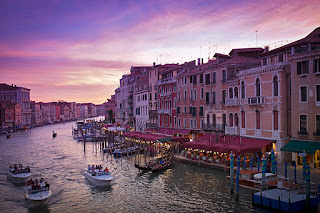
1. Use A Tripod
Many photographers struggle to use their tripod. Becoming one with your tripod will force you to slow down which, in turn, will result in better photos.
2. Get Closer & Simplify
 One of the biggest issues I see with many beginner images is that the subject is simply too small in the frame. Get closer, either physically or by zooming, and simplify your image so that your image has a clear subject. If the subject doesn't fill at least a third of the frame, you're too far away.
 3. Watch Your Shutter Speed
Blurry images are most commonly caused by a shutter speed that is too slow. If you are hand holding your camera, make sure the shutter speed is at least the reciprocal of your lens's focal length or faster. If the subject is moving, go even higher. For example if you are using a 24-70mm zoom lens, have your shutter speed at a minimum of 1/70th of a second (1/80th recommended) or a longer lens like a 300mm your shutter speed at a minimum of 1/300th of a second.
4. Hold Your Camera Steady
To go along with the last point, it's really important to hold your camera properly to ensure that your images are sharp. Put your left hand out, with your palm facing up then place your camera on top of your hand. Use the fingers of your left hand to turn the zoom and/or focus rings and to support the camera. Use your right hand to press the buttons and do everything else. Your camera should be supported 95% with your left hand. When shooting vertically, use the same arrangement. Have your left hand under the lens, right hand on the top (the shutter button should be on the top of the camera as well so it's a rotate counter-clockwise to get there).
5. Choose The Appropriate ISO
Most of the time to get maximum image sharpness and quality you want to select the lowest ISO possible. But when you're shooting in low light, or you need a little extra help for the shutter speed, don't be afraid to crank it up. I regularly use ISO 1600 or even 3200 in those low light conditions. My preference is to have a little bit of digital noise from the high ISO, and a sharp image over a blurry ones from a slow shutter speed. Noise can be edited and fixed, out of focus or blurry photos cannot be fixed.
6. Shoot At The Right Time Of Day
 I get that it's not always possible to pick when you can go out and shoot, but when you have the option, do it! Time of day does matter to how your photos look and feel, and can make the difference between a good photo and a great one. Want good night photos? Well, the trick is to actually shoot at the magic hour (an hour before sunset or after sunrise) not after it's totally dark. Want to create great portraits? Then going out at midday isn't going to help you make the best portraits, golden hour (an hour before sunset or after sunrise) is what you want here.
7. Get Creative With Composition
 You will see a drastic improvement in your images if you focus on getting more creative with your composition. How do you compose your shots? Are they all centred? Or are they all perfectly aligned with the Rule of Thirds? If so, it's time to get out of the box and try something different.
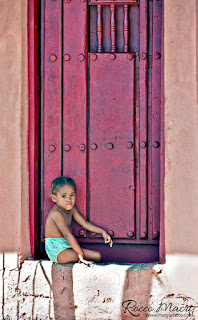
  Composition takes into account camera angle, so climb up high, or lay down low in the dirt to get a unique perspective. That will make your images stand out from the crowd. If you usually shoot horizontal, try shooting all vertical for a while. Push your own limits, think differently, and you will start to see differently. Look at the same subjects you see everyday with new eyes. Step back and try framing your subject in a doorway or window. Just do something, anything differently than usual.
8. Patience
This one may sound kind of strange or unrelated to photography, but trust me. It is ALL about having patience. For me, photography is about being in the right place at the right time, with the right lens on the camera, and being ready to shoot. That right moment doesn't run up and bite you... sometimes you have to wait for the decisive moment. That might mean having a late dinner so you can shoot the sunset, and magic hour following. Too often beginners pack up and leave just when the light is getting good. Patience also may mean sitting in one spot for hours waiting for just the right light, or for a bird or cyclist to enter your frame and complete your composition. Some of my best and favourite street photography images are ones where I found good light and an interesting background, and I waited for the right subject to enter the scene before I took the shot.
Until next time,
Rocco Macri
~~A photographer for all reasons...
**NOTE: All photos used in this post are the property of Macri Photography.
Rocco is from Sherwood Park, Alberta Canada. With over 30 years of experience, he prides himself in prompt delivery and affordable pricing. Rocco is an award-winning PPOC Master Photographer. In his spare time he is a guitarist with Celtic Fusion Illusion, a Celtic rock band. He would love hearing from you and may be reached at:


Thank you so much for sharing your art with us today, Rocco, and some very good tips! I love all of your photos.
ReplyDeleteLove the reminders. Mahalo for sharing with us.
ReplyDeleteThank you Rocco, those are incredibale tips, the average person might not have taken in to cosideration, patience and perciverance are two great qualities to have, and Rocco you are an extremely talanted fella. Thank you again Rocco and God Bless. Thomas
ReplyDeleteWelcome, Rocco! Thanks for all the wonderful information!
ReplyDelete