Showing posts with label #crafting. Show all posts

Kitten Shower


https://www.seattleareafelinerescue.org/

Early this spring we went to a kitten shower at our local cat rescue, Seattle Area Feline Rescue (SAFe). What is a kitten shower? It could have rained kittens and delighted me! In reality, it’s like a baby shower where donation fees go to purchase food, toys, blankets, medical supplies, and provide medical care for rescued kittens.

While there, I learned that SAFe loves it when volunteers makeblankets for the rescue cats and kittens. Each adopted cat goes home with its own blanket so it has something familiar as it settles in with a new family. Some blankets can be made from fleece material without any sewing skills needed. I purchased some cat-themed material and made over half a dozen fleece blankets.


Much of my leftover fleece material became kick toys, stuffed with
homegrown catnip and crinkle fabric that I found online (a SAFe staffer gave me a tip on where to find the fabric). I made a few fish-shaped toys with fabric left over from Christmas gifts.

 
Then I looked to my yarn supply and knitted a blanket. It ended up being smaller than the 24x24 inch size that is desired, so I added crocheted edging. I’m now knitting more kitty blankets with yarns found at estate and garage sales or at the sad closing of Joann stores 🙁where I also got discounted fabric for the blankets. 


My cat sat on the first blanket while I was knitting it and my husband guilted me into keeping it for her—she's a cute little thief. 😼 I think we’re both happy I know how to knit and crochet, and now the rest of the blankets can go to the shelter.
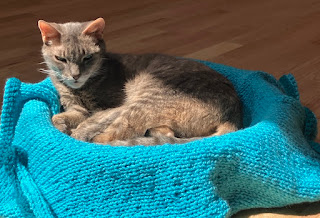


Mine!


Busy as a Bee


https://21acres.org/event/pollinator-fest-2025/

Later this month, my husband and I will be vendors at a local pollinator fest. There, attendees can learn all about bees, buy bee-related merchandise and local organic food. They can also wander a 21-acre farm filled with gardens of fruits, vegetables, and flowering plants.

My husband makes bee watering stations that need only a Mason jar or soda bottle to provide water. In autumn and winter especially, bees benefit from supplemental food and water, thus these feeders. 


The bee watering design and a customer photo.


Pattern and instructions: https://www.youtube.com/shorts/H3TFBWSYd28

Once he signed up as a vendor, I thought about other bee wares we could offer. After a trip to a fabric store, out came the sewing machine. The items I made are simple and took little time. The most useful items, in my opinion, are the pocket tissue holders, the easiest pattern ever! If it's pollen(ator) season, tissues might come in handy.


Another pattern I found was for scrunchies. Sew a simple tube, pull elastic through, and you’re done! 


Pattern: https://seekatesew.com/diy-gift-guide-free-diy-coffee-cozy-pattern


I had plenty more fabric at my disposal and found another easy pattern for cup cozies. These were the most time-consuming items due to needing four pieces of material cut out and fusible interfacing ironed on. Still, they were straightforward to make, and even cuter with little flower buttons to close the two ends. 


Instructions: https://www.youtube.com/watch?v=MIAqzWg5Ikc
Finally, I thought these fabric trays to hold all my items would be especially decorative. This is another pattern that was easy to sew and I’m very happy with how they turned out. After the pollinator festival I will find uses for them around the house.

I had fun bee-ing creative and hope visitors will enjoy all of the items we've both made. Here is our favorite bee quote by Elizabeth Lawrence.


Photo credit: https://homeiswheretheboatis.net/2017/07/19/the-hum-of-bees-is-the-voice-of-the-garden/


Soldering On


My Mushroom Lamp

The title for this post is not a typo. Last month my husband and I took a class that was designed to teach people how to solder. We aren’t beginners but I wanted a fun activity we could do together, and the class project to make a mushroom lamp really caught my eye.


Unsplash
My soldering experience goes back, way back, to my earliest computing job where I assembled specialized computers from very basic components. I’ve soldered tiny little resistors and thin wires, and also have soldering experience from stained glass work. The mushroom light project was a good soldering refresher.


The instructor had 3D printed mushroom stems and caps for us to choose from. Our soldered circuits went inside the mushroom caps. We then strung the wiring through the mushroom's stem.


After soldering and securing the circuit board in the mushroom's cap, we had to unwrap and glue in a couple dozen mushroom gills that the instructor had made with a laser cutter. That took quite a while as the blue protective film didn't come off easily. An additional benefit of the class was learning about a super glue accelerant. That will come in handy on our future projects!


The soldering portion of the class didn’t take long. However, the WLED software we used to program the lights on our completed mushroom lights fascinated me. It seemed there were endless possibilities and I’ll continue to change the lights occasionally.


Ta da! My finished lamp lit up


Uncovering the Past


I did it!

While this post isn't entirely about an archaeological project, it does involve uncovering a project I’d abandoned a year ago. I adore felted ornaments with hand-sewn decorations and I purchased a Bucilla kit containing twelve of them last year. I immediately encountered two problems.


First, I find it very difficult to sit still for any length of time. Second, the instructions, while intended to be simple and basic, couldn’t have been more difficult for me to understand than trying to decrypt Viking runes. Fortunately, YouTube had instructional videos that helped me decipher the "simple" steps and sewing stitches needed.


So how did I finally resume this project? Archaeological videos, especially Digging for Britain. Most people probably listen to music or movies while crafting, but I love the ancient past and it is what kept me seated long enough to finish all these ornaments in just a few weeks.


https://www.britishmuseum.org/collection/object/H_1963-1208-126

Hand sewing has a long tradition, a wonderful connection to the past. Imagine the labor that went into creating thread in antiquity—shear the sheep, card the wool, then use a hand whorl to get the final product. Many of these spindle whorls (photo at right) have been found in ancient burials.


https://en.wikipedia.org/wiki/Tara_Brooch

 While struggling to do the different stitches, I found it amazing to see the fine metalwork from these late 8th or early 9th century brooches. As difficult as spinning thread would have been, imagine doing something just as delicate with metal! Let’s not forget the metals had to be extracted from rocks, refined, cast, and finally hand-worked by an experienced craftsman.


Watching the archaeology videos made the work so enjoyable that I plan to do another embroidery kit later this year. First, there are other crafts to learn and make.


Prepping and Plotting


The busy holiday season is upon us again! I’ve had so much fun this month preparing Halloween, Thanksgiving, and general fall-themed cards. 

I have stacks of all these typessome needing envelopes and some still waiting to see what kind of card they will be.


While watching card tutorials from Gina K on YouTube, I discovered foiling products I’d never used. That changed quickly! I love foiling and these new materials make it so easy—easy to use up a lot more foil, but they make beautiful cards with plenty of shine.

Gina's products enable me to use both the original foiled design as well as the leftover foil. Another product came out recently that makes it easy to foil without heat and the results were very satisfying.

Leftover foil
Original foil


But that’s not all the preparations I have going. There are already many, many Christmas cards to donate to the food bank clients, and I’m eager to put more new supplies and designs into use.
 

More stacks of cards--all Christmas

Amidst all this card making fun, I'm also busy plotting for NaNoWriMo. This year’s sweet romance story involves heroine and hero working to keep residents at a senior living facility jolly and safe throughout December. Their two goals don’t go hand-in-hand, so my characters will need a little compromise to find their happily ever after.

What I haven’t planned is the title for my NaNoWriMo story. While the days are growing shorter, I'm hoping for a flash of inspiration for a title idea or two.


Eeek!


Yes, Halloween is approaching, but that’s not what frightened me this month. No, it was the apples that needed to be sliced for freezing, or

turned into applesauce and apple butter. Then it was the cucumbers to be pickled, followed by tomatoes to be sauced. Garden cleanup for final fruiting began and next month I will be transplanting these raspberries as well as planting a few new blueberry bushes. 


Halloween cards are under way and I’ve used a few different techniques this year. One new technique involved quite a learning
curse, er rather, curve. 😉 There were many stencils that I wanted to buy for making cards but instead, I went to my Cricut to cut stencils with happy results! This simple pumpkin face and the photo at top are done with stencils I made on the Cricut.


Bowl Cozy
Soon Thanksgiving and autumn cards will be started, and of course, Christmas gift planning is already underway. Learning curves continued when I took another sewing class to make bowl cozies. They turned out great and gave me ideas for Christmas gift bags!


And what else happens in November? Why, it’s NaNoWriMo—National Novel Writing Month. I’m plotting another Christmas story to write in November. It’s 50,000 words in November for the “win”! 


With all that fall planning underway I'll be sure to stock chocolate for the trick-or-treaters! (And a piece or two for myself 😊.)


A Gilded Mess


Large gilding flake, off-brand flakes, and washi tape


Those who detest glitter probably want to read no further. It gets messier. Messier than glitter? Oh yes. Myself, I love glittery and metallic papers for card making. Sparkle just makes a card better! But I’ve met my match with some off-brand gilding flakes.

The major brands of gilding flakes come in large pieces (see above) that are easier to manage. But I loved the colors in this thirty pack set. 


After an initial attempt at using them I immediately discovered this was an outdoor endeavor. Why? Gilding flakes are incredibly volatile, in the sense of flying. As soon as you open the jar, flakes take flight. This is neither an activity for anyone with hay fever nor undertaken on a breezy day.

Gilding flakes can be used in several ways, though my favorite is with sticky-back paper. Other methods are with glues applied to an entire card base (4.25 x 5.5), or with stamps to gild an image. They also cling to anything in sight--skin, clothing, everything in the crafting room, and kitty.

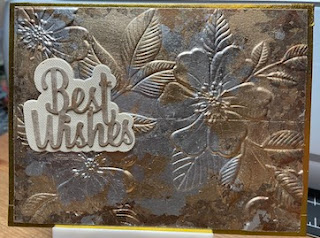
I do love the effects of beautiful metallic pieces for entire card backgrounds or used to die cut shapes as accent pieces on cards. I tried several backgrounds and decided the multicolored panels don’t show up that well when embossed.

Gilding flakes and glitter work great in resin coasters without making a mess! 

I’ll be sticking with hot foiling, metallic papers, and metallic washi tape for a while now. My gilded age is taking a break while I attempt to clean up the craft room, sweep the patio, and brush kitty.


Foiled Again


My favorite foil
 No, my attempt at something wasn't thwarted. Rather, while making Christmas cards I rediscovered the joy of foiling. I did also relearn the difference between the two primary ways I make foiled cards, so I guess you could say there were some foiled attempts through this process.

The first way I can foil cards is with a device called the Go Press and Foil as seen at right.This device uses plates that are heated and a special foil that is heat activated to adhere to the paper.


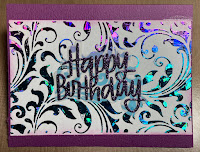
This is the birthday card I created for my sister using the hot plate shown above. The pink outline of the flowers is foiled and I colored in the rest.


The March kit
Now that I’ve been buying quality products, I am delighted with this process and even signed up for a monthly hot foil kit-of-the-month subscription. Each month I get a new plate and die set along with a roll of foil.


The second method of foiling cards is with the Glaminator. This machine needs a product called transfer gel or embossing powder to make foil adhere to the paper. It can be trickier to get clean results, but with the Glaminator I can use stencils with transfer gel, or stamps with embossing powder that melts to allow the foil to adhere.

Glaminator success

Foils for each machine come in a variety of colors and patterns.  Having done a lot of practice this month, I now have everything well documented so there are no more foiled attempts at foiling cards. 😀


Happy Belated St. Patrick's Day Readers!


December Wrapping Up December


Stenciled, inked, and stamped

 December saw a continuation not only of holiday card making, but other crafts as well. As always, I didn’t get as much done as I’d planned due to a short illness. Doesn’t something always mess up holiday plans? (Note to self: this is why you plan further ahead!)


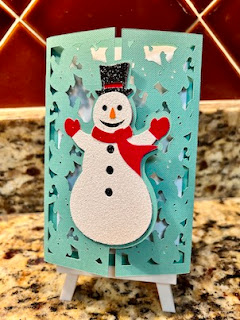
But, no time for digression, Christmas is coming! Lots of wonderful cards got made thanks to the Cricut. Frustrated with the lack of options on the Cricut site, I searched online for SVG (Scalable Vector Graphics) files for Christmas cards. I was not disappointed! Here is one of my favorite, whimsical cards in a gate-fold style.
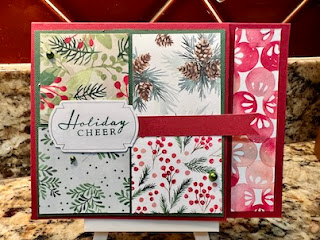
Another style of card I like to make uses patterned paper. This design allowed me to incorporate five different specialty papers. A Facebook group I follow had many wonderful examples of cards using patterned papers and unique folded cards. I found plenty of inspiration!

Because I had so many new designs I wanted to try, I ended up with just one card of each type--Cricut, patterned papers, and stamped. No one will be getting mass-produced cards from me this year, nor did they last year.

I made way more cards than I know people to send them to, which begged the question “What to do with extra cards?” My husband came up with a great suggestion to send them to nursing staff at our local hospital. We can drop them off at the visitor information center to be distributed to different floors.

Mint soap
Cards weren’t all that I worked on. I’m really happy with the mint and orange soaps I made for family.
 
In addition to cards and soaps, this year I tried my hand at a soup mix in a jar. The mushrooms I grew and dehydrated over the summer are part of what make this homemade gift special. 
I had one success at making ornaments (I don't sit still long enough for hand-sewing projects). So I'll end this post with a gold star. 😊


Boats, Boots, Bikes

Sign at the Stehekin Valley Ranch cookhouse. Good eatin' in Stehekin.   The Stehekin ferry Early this month we vacationed in a location...