Showing posts with label #cardcreator. Show all posts

Sometimes Life Does Imitate Art


The book I’m currently working on features a protagonist who is an assistant manager at a food bank. The idea came to me because I love volunteering at a food bank near me. Recently, while setting up for the morning shift, I noticed several Easter cards on a table with miscellaneous non-food items.

If you’ve read this blog even occasionally, you probably know I’m a card maker. I love incorporating new techniques and patterned papers, but
have far too many cards to use myself. In my book, the main character is also a card maker (write what you know, eh?). I asked one of the managers at the food bank if I could bring in cards that I make and he gave the okay.

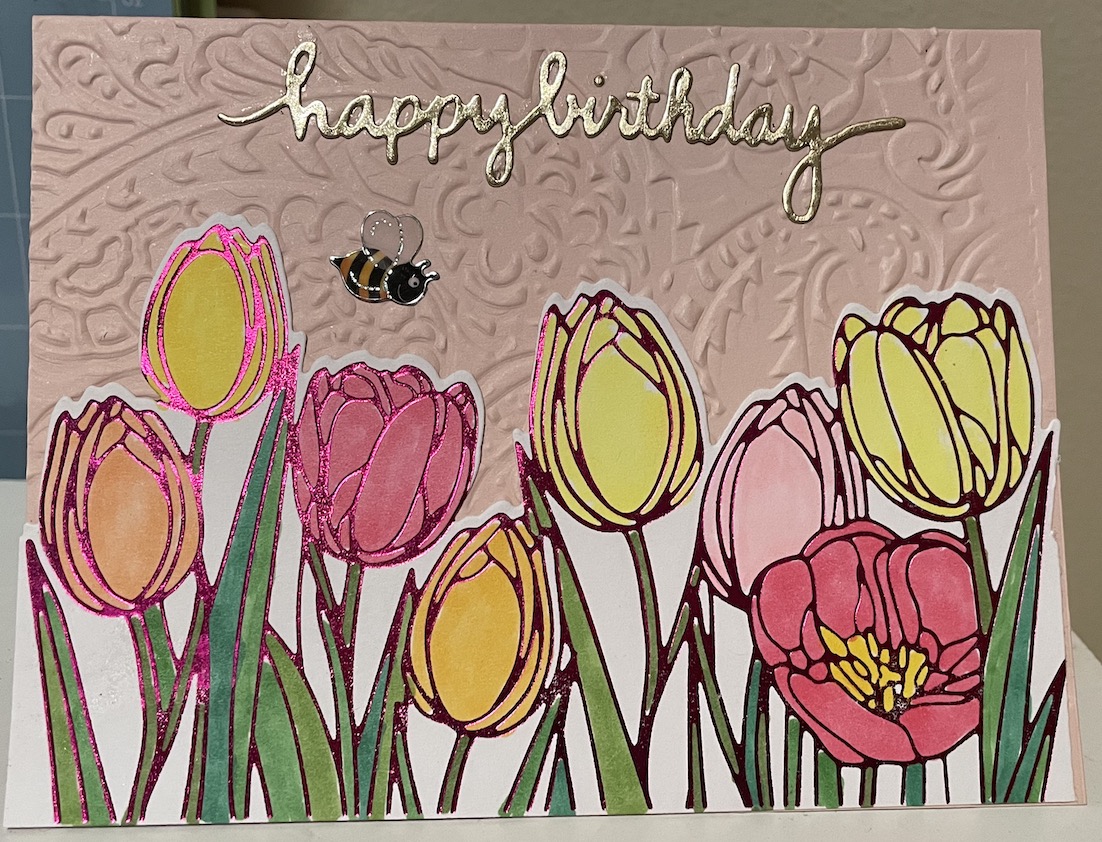
Joy! Something to do with the cards I love making, and our clients have been enjoying them as well. I brought in several Easter cards last month and since it’s a little too early for the Mother’s Day cards I’ve stockpiled, I focused on birthday cards this month. 


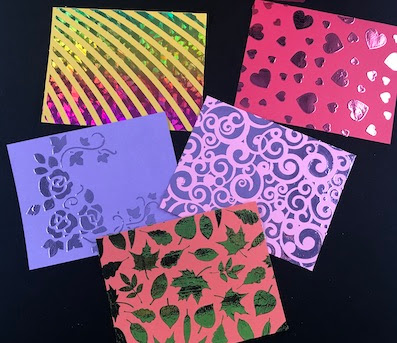
I pulled out the hot foil plates and press and spent 45 minutes preparing card bases that were then ready for embellishments. The week after Easter, I started taking in the birthday cards and saw one woman take home three! 


While there are organizations that take extra cards, like my protagonist, I enjoy seeing my cards go home with people who are excited when they see them.


I'm blessed to be able to craft cards and have a full plate. I'd love it if readers would consider regular donations to their local food banks. All proceeds from my upcoming book will be going to the food bank where I volunteer.

https://www.udistrictfoodbank.org/donate/


All That Glitters!


Embossing folder, washi tape, and snowflake cut with Cricut.

It’s my favorite card-making time of year! As usual, glitter and sparkle graced each card I made. Every year some of the big card makers and card making suppliers host free classes on YouTube, Facebook, and their own web pages. 

I learned a number of techniques I had to try, bought new supplies I loved, and discovered one very useful new tool. The new tool makes it easy to adhere very delicate pieces such as greetings on a card.

Not only did I use stamps, embossing folders, and hot foil plates, but the Cricut also played a big part in drawing designs and cutting out a lot of glittery snowflakes.

So let’s take a look!


No end of sparkle here! A very simple card, but lots of visual impact. Glitter papers cut with Cricut. (Thank you, hubby, for aligning all those trees!)


 A stamped image with ink blending for the background. Lots of glitter drops for the ornaments, and a hot foiled sentiment.


The fanciest hot foil card I made this year. Breathed a sigh of relief at how well everything lined up!


This hot foil plate arrived a day late for the card to be mailed, but I love the holographic foil and how decorative the jewel embellishments look. I'll be using it a lot for next year's cards.


I loved this design cut with the Cricut and using holographic paper for the background.


The snowflake design was drawn with the Cricut and I added jewels for sparkle. The card with all foil is made with the first 3D embossing folder I bought after watching a class where it was used. Another chance to embellish with jewels!


One more card I made to announce a very special day--an historical day!

That's 44 years at the University of Washington.

I'll have so much more time to use my crafting supplies now. I'm going to need a bigger Christmas card list! 😁


Foiled Again


My favorite foil
 No, my attempt at something wasn't thwarted. Rather, while making Christmas cards I rediscovered the joy of foiling. I did also relearn the difference between the two primary ways I make foiled cards, so I guess you could say there were some foiled attempts through this process.

The first way I can foil cards is with a device called the Go Press and Foil as seen at right.This device uses plates that are heated and a special foil that is heat activated to adhere to the paper.


This is the birthday card I created for my sister using the hot plate shown above. The pink outline of the flowers is foiled and I colored in the rest.


The March kit
Now that I’ve been buying quality products, I am delighted with this process and even signed up for a monthly hot foil kit-of-the-month subscription. Each month I get a new plate and die set along with a roll of foil.


The second method of foiling cards is with the Glaminator. This machine needs a product called transfer gel or embossing powder to make foil adhere to the paper. It can be trickier to get clean results, but with the Glaminator I can use stencils with transfer gel, or stamps with embossing powder that melts to allow the foil to adhere.

Glaminator success

Foils for each machine come in a variety of colors and patterns.  Having done a lot of practice this month, I now have everything well documented so there are no more foiled attempts at foiling cards. 😀


Happy Belated St. Patrick's Day Readers!


Hitting a Brick Wall? ` by Lexa Fisher


I usually don't think of a brick wall so pretty as the embossed pattern above from one of my fellow card makers. This example inspired me to challenge myself to see what I could do with cards that start out as empty brick walls. Along the way I also looked at a few examples of brick sayings--hit the bricks, gold bricking, and hitting a brick wall.


Hitting the bricks with my first attempt provided a much needed warm-up opportunity. My favorite card supply shop closed last January and I was a little rusty from the lack of camaraderie and inspiration. Starting simple, I colored bricks using a stencil my husband designed and made on one of his 3D printers.


My second card has raised bricks that were done with the stencil and tinted modeling paste. My husband shares his 3D creations on Thingiverse and this is his most often downloaded design. Sounds like other card creators like Thingiverse.


My card making muscles are warm now, so my next card used the Glaminator to create a shiny red brick wall. Another tool I pulled out was my Cricut to cut out the letters J and Y. 


Here's where I recalled the phrase "to gold brick", meaning to cheat or swindle. My first idea was to use gold glitter for the bricks. A lot of crafters hate working with glitter, and I'll admit that after this trial I've had my fill for the year :) 

Then I switched to gold leaf--still a bit messy, but not as much as glitter, and it's not something to be used during allergy season! It may look like you're pulling out a tiny pinch, but it really fluffs up and  breathing on it will send it all over the room. Here is a card made with gold leaf.

That's enough designing with bricks, so I'm hitting the yellow brick road to make other holiday card creations!

Photo by Akshay Nanavati on Unsplash


Meet Our Members

Author Lexa Fisher


Lexa writes seasoned romance—romance between characters who are over forty. Her characters value integrity in a partner and a relationship founded on trust. Gratitude and thanks are predominant themes in her cards, and sparkle is always an element in her designs.

To learn more about Lexa and read her prior blog posts, please click HERE

Meet Our Members

Lexa Fisher
Lexa lives with her husband and spoiled little rescue cat in Seattle. Transplanted from Michigan decades ago she earned her BA at the University of Washington where she now works as an IT construction project manager. 

To read more about Lexa and her former blog posts, please visit her MEMBER PAGE

Meet our Members ~ Lexa Fisher

  Lexa Fisher
Romance Writer and Greeting Card Creator

Lexa is from the Seattle area and when she isn't writing romance, she is creating beautiful greeting cards. To find out more about Lexa and read her prior blog posts, please click on the link below.

MEET OUR MEMBERS ~ Lexa Fisher

Lexa Fisher

Lexa lives with her husband and spoiled little rescue cat in Seattle. Transplanted from Michigan decades ago she earned her BA at the University of Washington where she now works as an IT construction project manager. After a nightly workout she pursues romance writing and crafting greeting cards. 

Lexa writes seasoned romance—romance between characters who are over forty. Her characters value integrity in a partner and a relationship founded on trust. Gratitude and thanks are predominant themes in her cards, and sparkle is always an element in her designs.

If she had to depend on her green thumb she wouldn’t survive a year, but for some inexplicable reason year after year she tries to grow edible plants.

To view Lexa's artwork and social media links, please click MEMBER PAGE

Tourist in My Own City

https://visitseattle.org/ Early this month my niece visited Seattle from the other Washington for the first time. Though she only had two fu...