 |
| Embossing folder, washi tape, and snowflake cut with Cricut. |
It’s my favorite card-making time of year! As usual, glitter and sparkle graced each card I made. Every year some of the big card makers and card making suppliers host free classes on YouTube, Facebook, and their own web pages.
I learned a number of techniques I had to try, bought new supplies I loved, and discovered one very useful new tool. The new tool makes it easy to adhere very delicate pieces such as greetings on a card.
Not only did I use stamps, embossing folders, and hot foil plates, but the Cricut also played a big part in drawing designs and cutting out a lot of glittery snowflakes.
So let’s take a look!
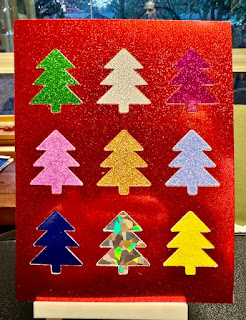
No end of sparkle here! A very simple card, but lots of visual impact. Glitter papers cut with Cricut. (Thank you, hubby, for aligning all those trees!)
A stamped image with ink blending for the background. Lots of glitter drops for the ornaments, and a hot foiled sentiment.
The fanciest hot foil card I made this year. Breathed a sigh of relief at how well everything lined up!
This hot foil plate arrived a day late for the card to be mailed, but I love the holographic foil and how decorative the jewel embellishments look. I'll be using it a lot for next year's cards.
I loved this design cut with the Cricut and using holographic paper for the background.
One more card I made to announce a very special day--an historical day!
 |
| That's 44 years at the University of Washington. |
I'll have so much more time to use my crafting supplies now. I'm going to need a bigger Christmas card list! 😁


No comments:
Post a Comment